Saturday I took an amazing workshop at White Barn Farm in New Paltz, NY. I saw the pictures of a workshop done by Paula last year and had been looking for another one this year. The over 5 hour drive (round trip) was more than worth it for all the education and experience I gained.
Paula has an amazing space for dyeing that I can only dream of.

Paula taught us much more than I could have even hoped for in the short 5 hours of the course, and we all came home with amazing memories and beautiful mini skeins of samples.

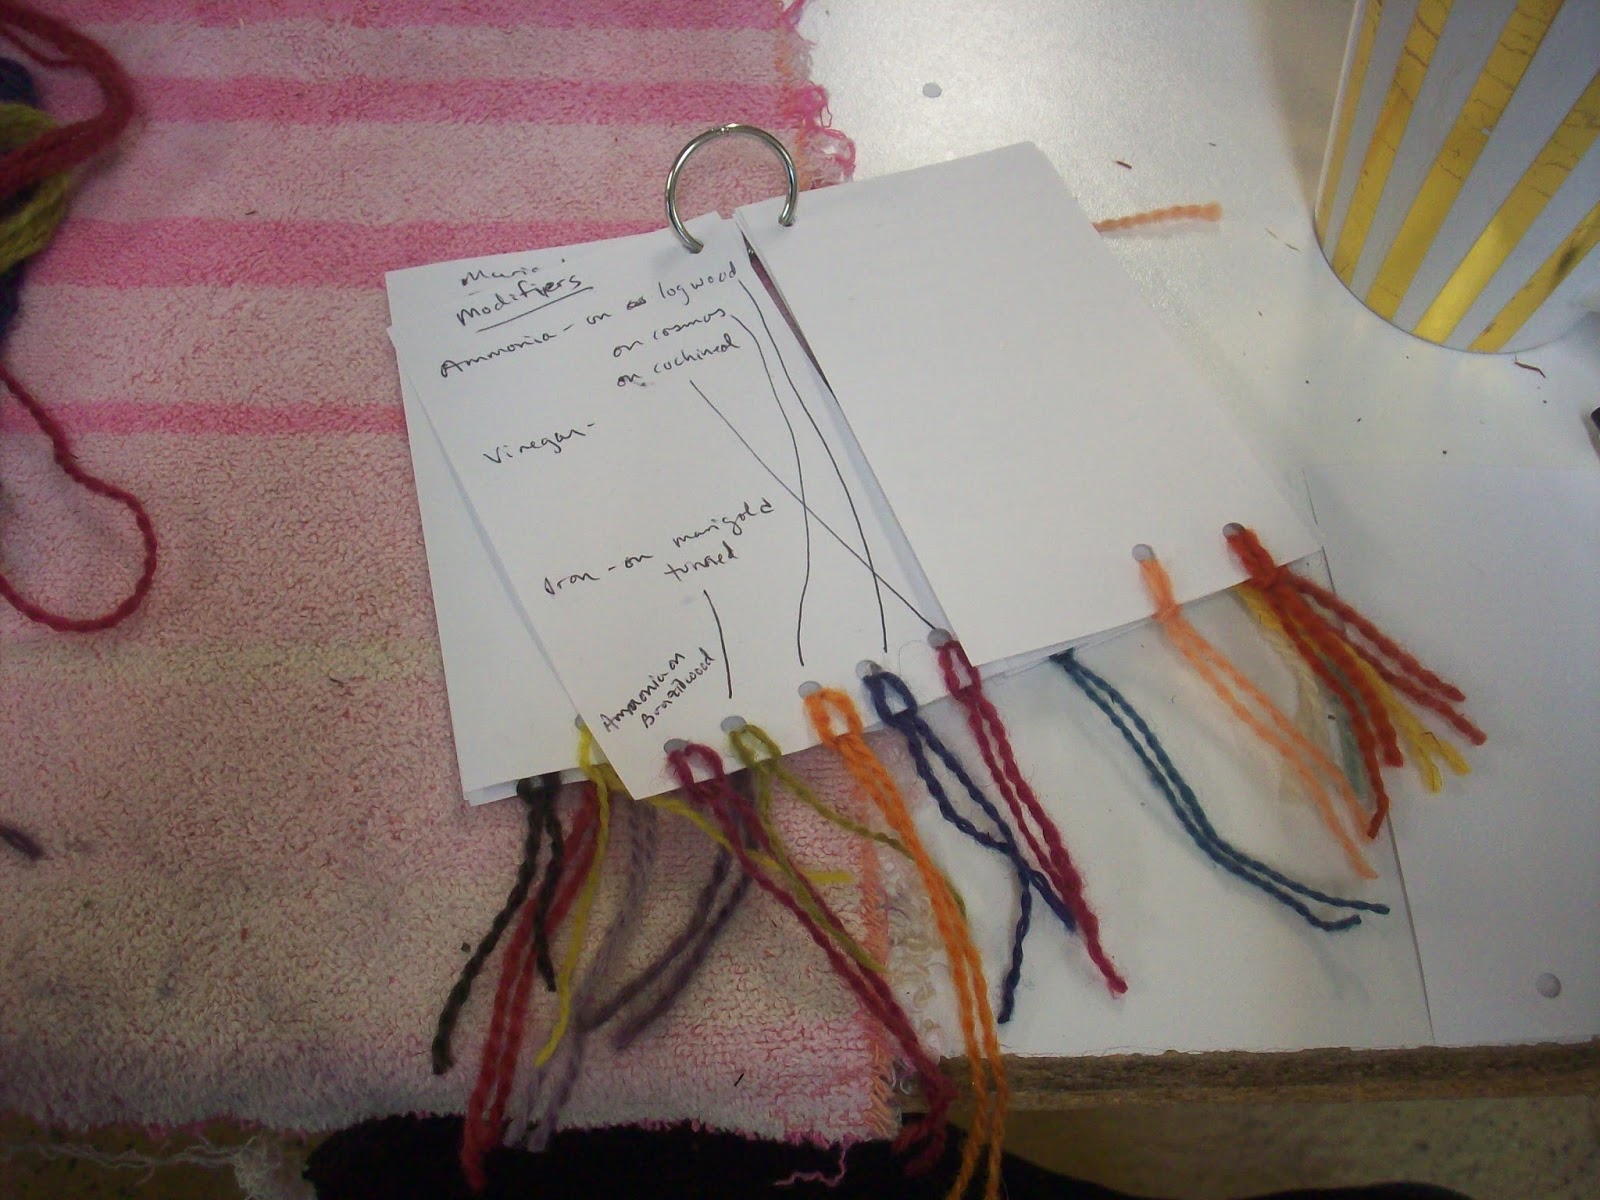
Documenting what we were doing (so we would remember) was stressed and we made these notecards for reference.
The day began, after getting a nice big mug of my favorite Earl Grey tea, with a discussion of mordanting with alum and cream of tartar. Paula had already started mordanting the wool we would be dyeing during the workshop. After splitting up our skein into ten mini skeins and marking them with different colored rubber bands (so we could tell ours from the others) we went out to look at Paula's dye garden and pick some leaves and flowers.
She had two nice patches of indigo.

One of madder (which needs to be three years old to harvest the roots. Unfortunately this patch was only on its first year.)

Then we focused on flowers; specifically marigolds and cosmos.


Back inside with our harvest from the garden, our first task was making a dyebath with fresh indigo leaves. A blender was packed full of leaves, then distilled water was added and the whole lot blended.

We added our mini skeins and waited. While waiting we went on to the indigo vat. This was just indigo powder, lime and thiox. The scum on top is removed when dyeing, and then replaced.


The skeins dyed in the fresh indigo leaf vat also started out green then turned a beautiful pale blue with exposure to the air.


We made up three half gallon canning jars with madder root, brazilwood and logwood in a large canning kettle on a camp stove. Each jar received two tablespoons of the dye material and was a little over half filled with distilled water. The jars were the simmered in the water bath, then our skeins were added.


We made another three jars with cosmo flowers, marigold flowers, and cochineal. The cochineal bugs are shiny little bugs that live on the prickly pear cactus in the southwest.

One of the most interesting parts of the workshop was playing with the modifiers. An ammonia rinse gave the most gratification. The ammonia turned our deep purple/brown logwood into a lovely shade of blue with a touch of violet. The cosmo yellow became a vivid orange, and the ammonia brought out more of the reds in the madder. The iron modifier turned the marigold yellow into an olive green.
With all the knowledge I gained on Saturday I felt confident enough to play around on Sunday at home. I had a vat of soaking walnuts and over 30 skeins of Mercer's wool. After straining out the walnuts I simmered the dye on the Coleman camp stove I found in the basement from our modern camping days. Then I added the skeins. From all my reading I learned that walnut dyeing does not require mordanting, unless you want to change the end color.


No comments:
Post a Comment